Groups
The Groups tab makes it easy for administrators and technicians to create groups and manage members. It also shows groups synchronized through automated provisioning.
Group supervisors can view information about the groups of which they are members in the Organization Client Portal. To assign supervisors for a given group, simply add the users with this role to the group.
Synchronized accounts and groups: These functions may be disabled depending on how provisioning was configured.
Adding a Group
If you are the administrator or technician for your organization, you can add a group by doing the following:
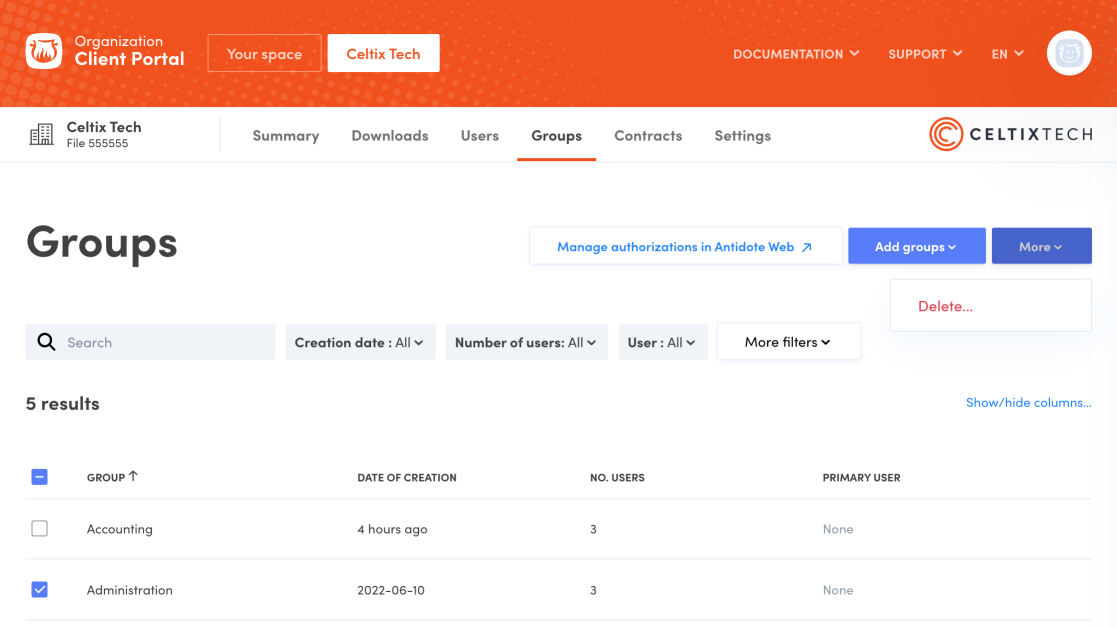
- Open the Groups tab in your Organization Client Portal (A).
- Click the Add groups button (B).
- Select the Create a new group option in the scroll-down menu.
- Type a name for the group in the next window.
- Click Add.
The new group will appear in the group list.
-
 AB
AB
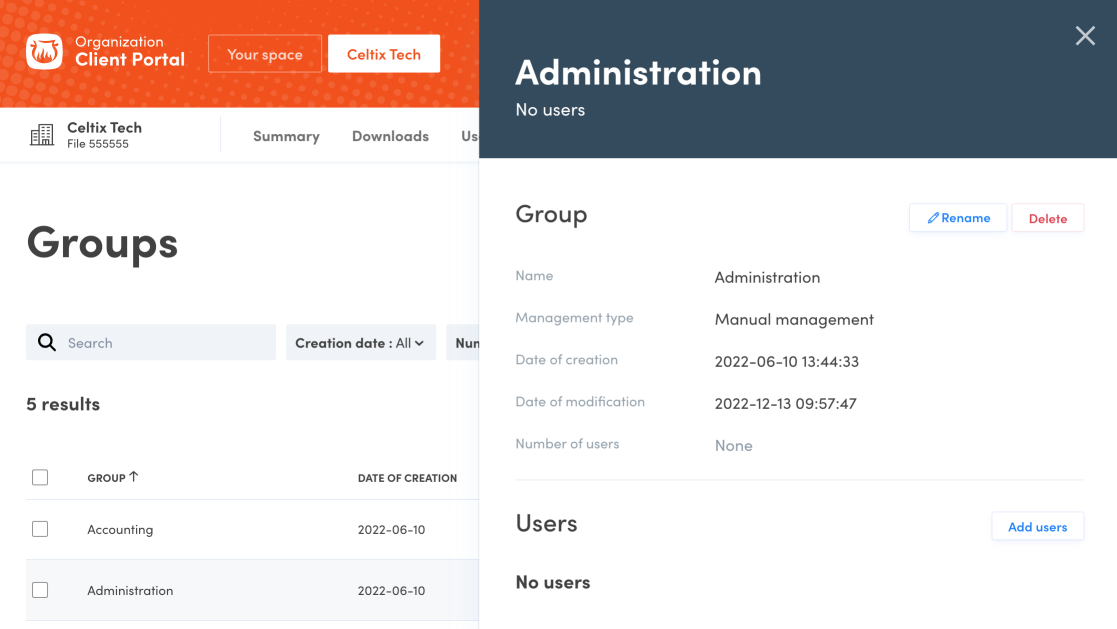
Adding users to a group
Click the group row (C) to display the group details panel, then the Add users button (D). Make sure you have created user accounts before carrying this out.
-
 CD
CD
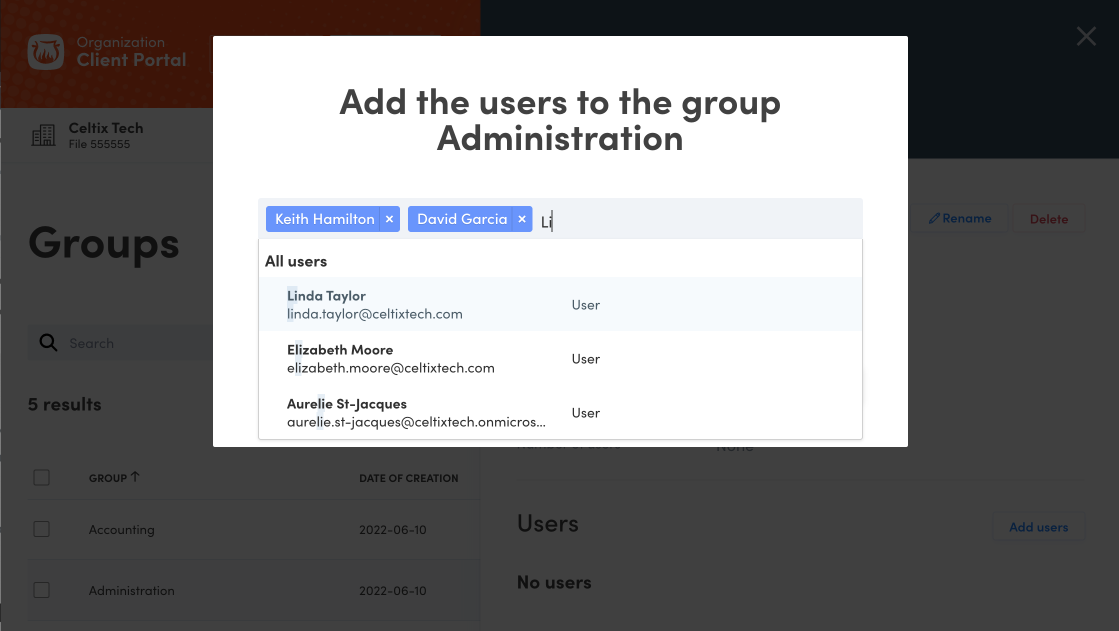
Type a few letters of the user’s name in the field. The list of corresponding users will appear. Make your selection. Click on the X next to a selected user’s name to remove them.
Click Add to complete the process.
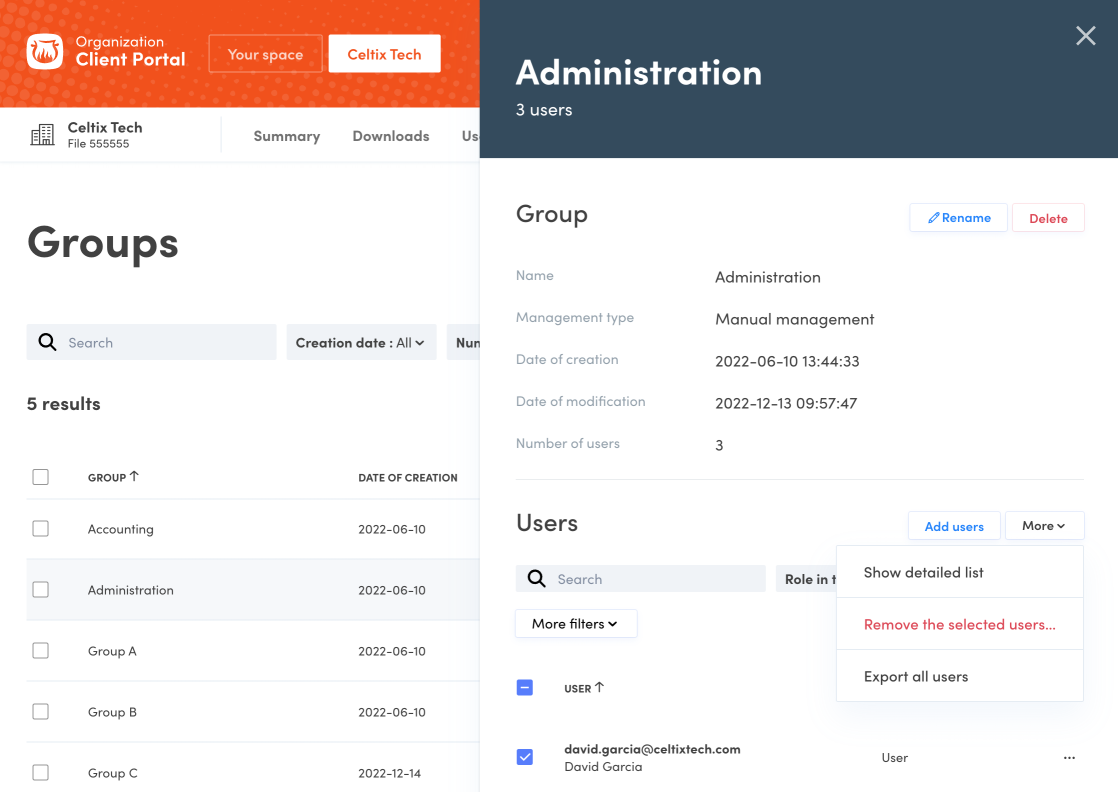
Removing users from a group
Click the group row (E) to display the group details panel. Check the boxes for the users you want to remove (F), then click the More button (G) and select Remove the selected users.
You can also remove a specific user from a group using the quick menu (⋯) (H).
-
 EFGH
EFGH
Exporting the List of All Users in a Group
Click the group row (E) to display its details panel. In the Users section, click the More button (G) and select Export all users.
Deleting a Group
To remove groups, check all relevant group boxes (J), then click the More button (K) and select Delete.
You can also delete a specific group by selecting its row in the list and clicking Delete in the details panel.
This deletes the group but not the users.
-
 JK
JK