Adding Connectors
To integrate Antidote Web with local software, you will first need to add the necessary connectors. Learn how by clicking the tab below that corresponds to your computer system: Windows, Mac or Chromebook.
Note
— You also have the option to add a connector only to your browser.
— Connectors cannot be installed on smartphones or tablets.
Windows
Mac
Chromebook
Windows
-
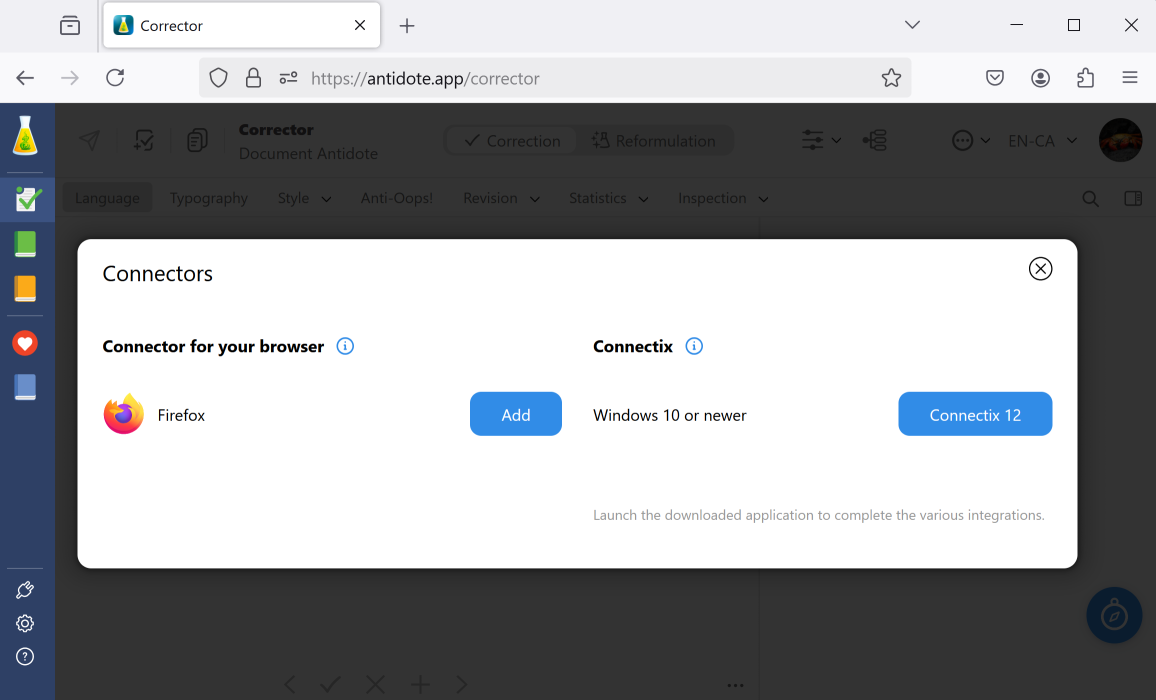
If you did not download the Connectix installer when you first configured Antidote Web, log in to antidote.app, click the icon (A) in the sidebar on the left, then click the button for downloading Connectix (B).
Note— If you see more than one option, select the one that corresponds to the operating system you are using.
-
 1A1B
1A1B
-
-
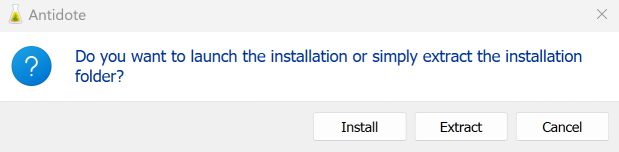
Double click the downloaded file (in your Downloads folder or wherever you chose to save it) to open the Connectix installer.
-
Confirm that you want to run the installer by clicking Install.
-
 3
3
-
-
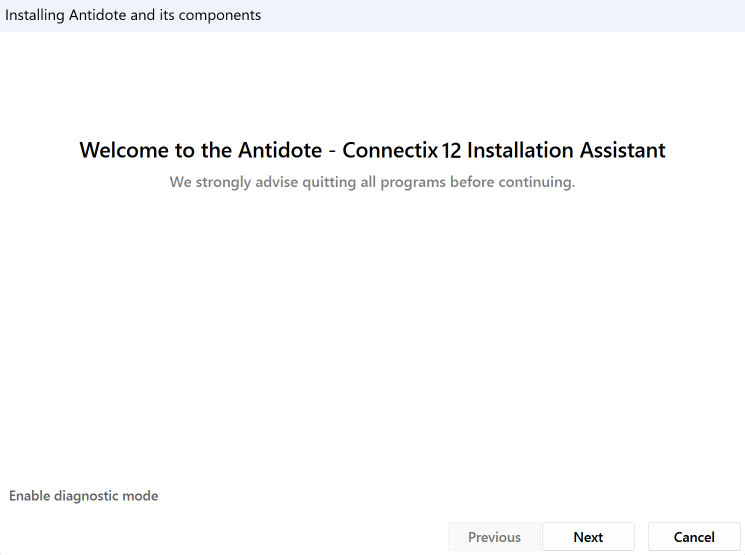
Click Next in the installer window.
-
 4
4
-
-
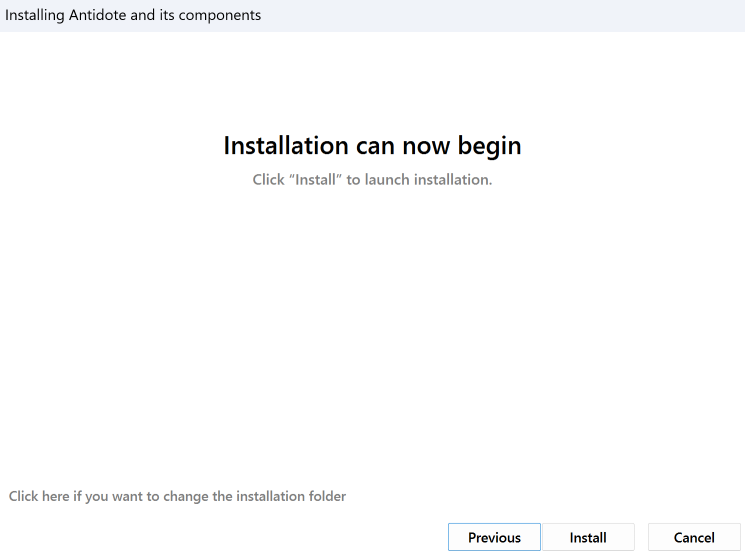
Click Install to confirm and begin installing Connectix.
-
 5
5
-
-
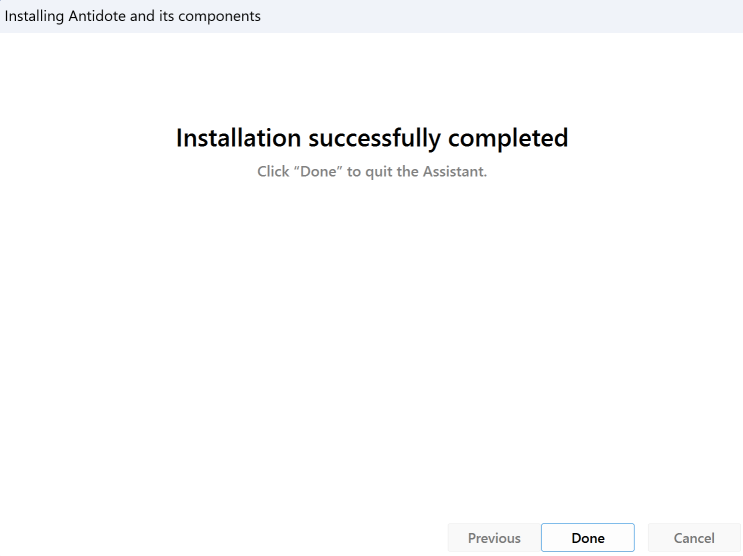
Click Done once installation is complete.
-
 6
6
-
-
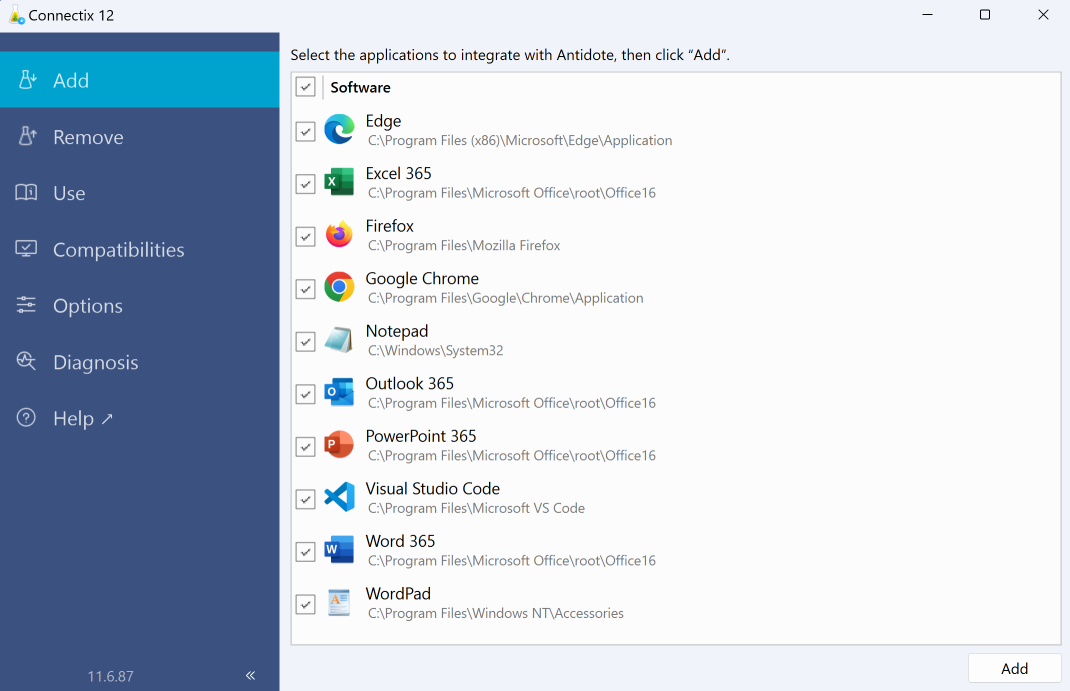
Connectix will open automatically to show you the list of compatible software installed on your computer for which you can add connectors. Tick off all the software you want to integrate with Antidote (A) and click Add (B).
-
 7A7B
7A7B
-
If necessary, follow the instructions provided by the utility to add certain connectors; web browsers may require additional steps.
You can then use Antidote Web directly where you write!
Mac
-
If you did not download the Connectix installer when you first configured Antidote Web, log in to antidote.app, click the icon (A) in the sidebar on the left, then click the button for downloading Connectix (B).
Note— If you see more than one option, select the one that corresponds to the operating system you are using.
-
 1A1B
1A1B
-
-
Double click the downloaded file (in your Downloads folder or wherever you chose to save it) to open the Connectix installer.
-
Double click the flask icon in the window that opens to launch the installer.
-
Click Continue in the installer window.
-
 234
234
-
-
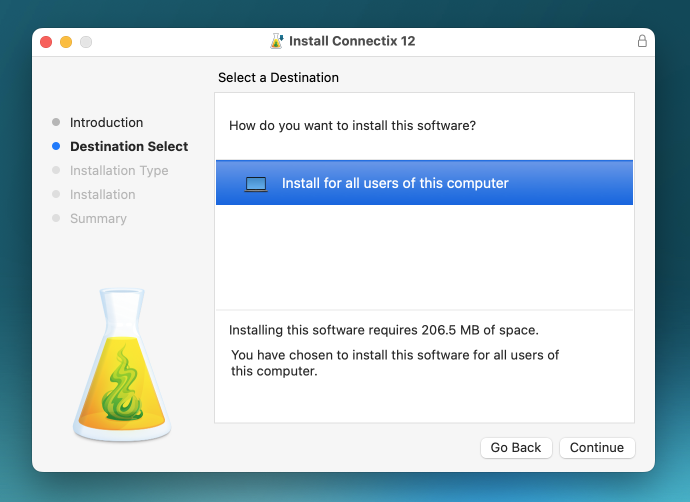
Click Continue on the next screen to install Connectix for all users.
-
 5
5
-
-
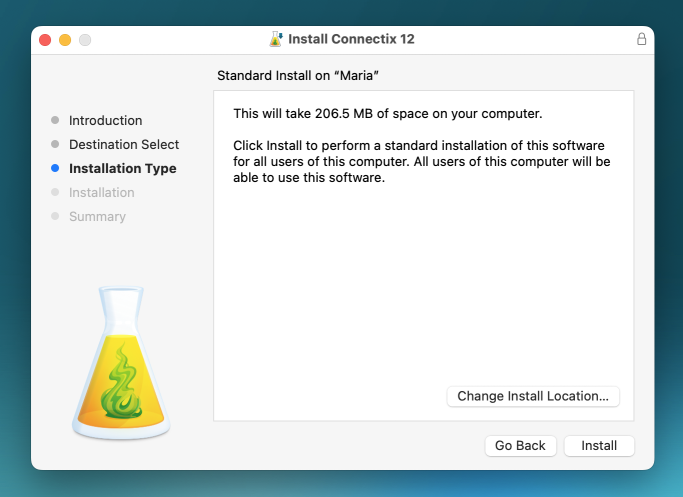
Click Install to confirm and begin installation.
-
 6
6
-
-
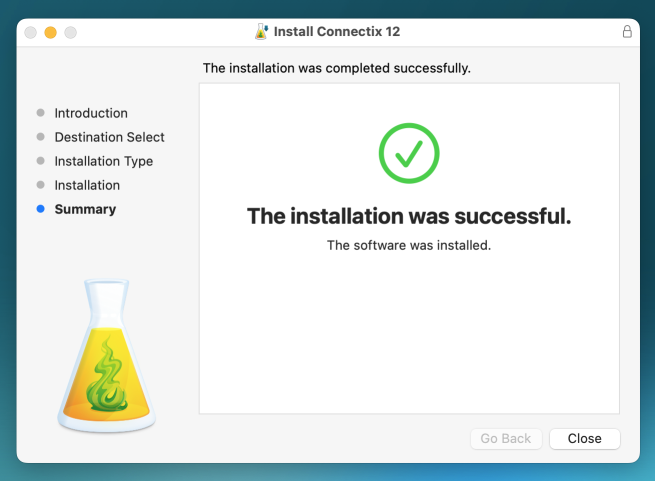
Click Close once installation is complete.
-
 7
7
-
-
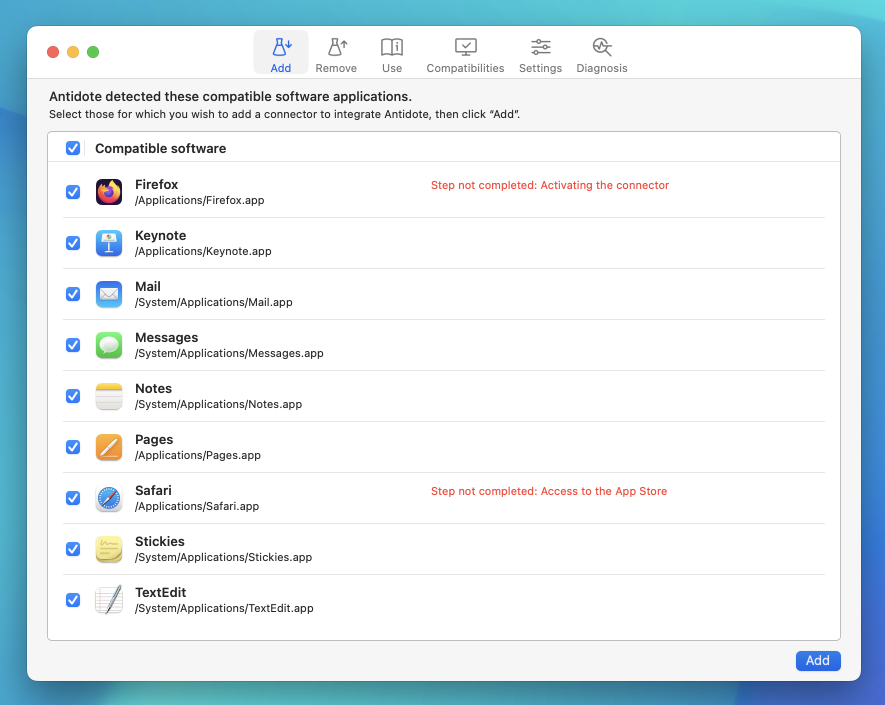
Connectix will open automatically to show you the list of compatible software installed on your computer for which you can add connectors. Tick off all the software you want to integrate with Antidote (A) and click Add (B).
-
 8A8B
8A8B
-
If necessary, follow the instructions provided by the utility to add certain connectors; web browsers may require additional steps (as shown above).
You can then use Antidote Web directly where you write!
Chromebook
Chromebooks are laptop computers that run ChromeOS, an operating system developed by Google. ChromeOS is built around the Chrome browser, which runs web-based apps like Gmail and Google Docs. As a result, you cannot install traditional software like Connectix on a Chromebook.
Not to worry! Druide offers a free connector that you can install separately to enable integration with Antidote Web.
Adding the Antidote Connector to Chrome
-
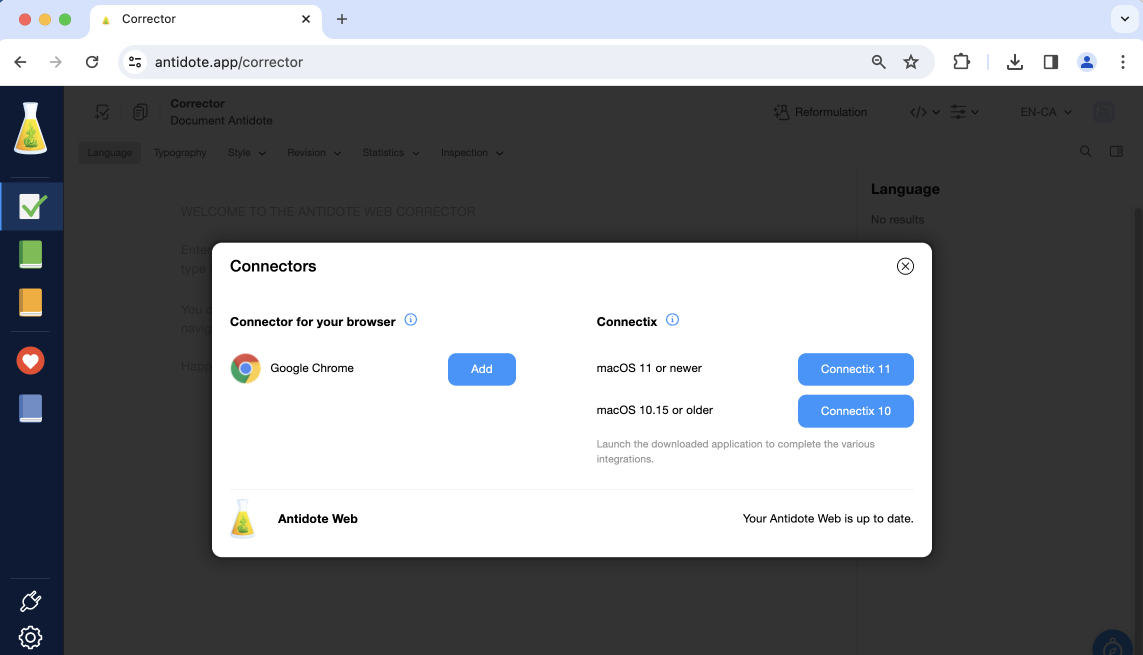
If you did not install Antidote’s connector for Chrome when you first configured Antidote Web, log in to antidote.app and click the icon in the sidebar on the left.
-
Click Add in the pop-up window that appears.
-
 12
12
-
-
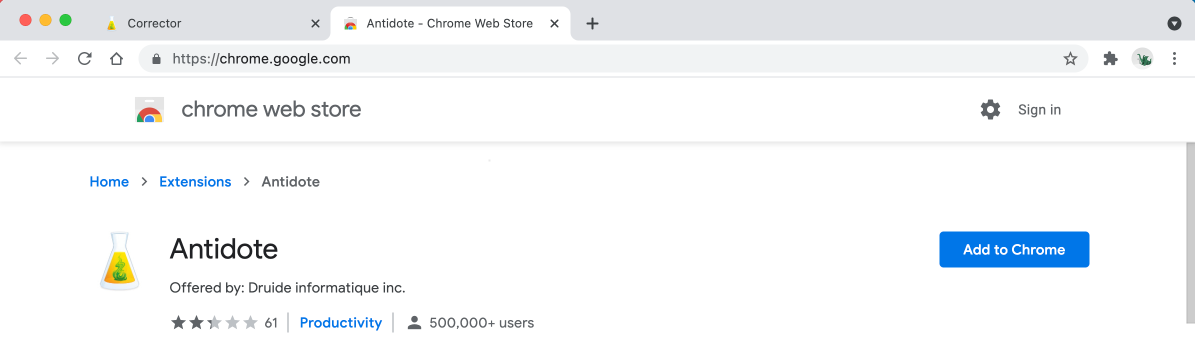
In the new window that opens on the Chrome Web Store, click Add to Chrome.
-
 3
3
-
-
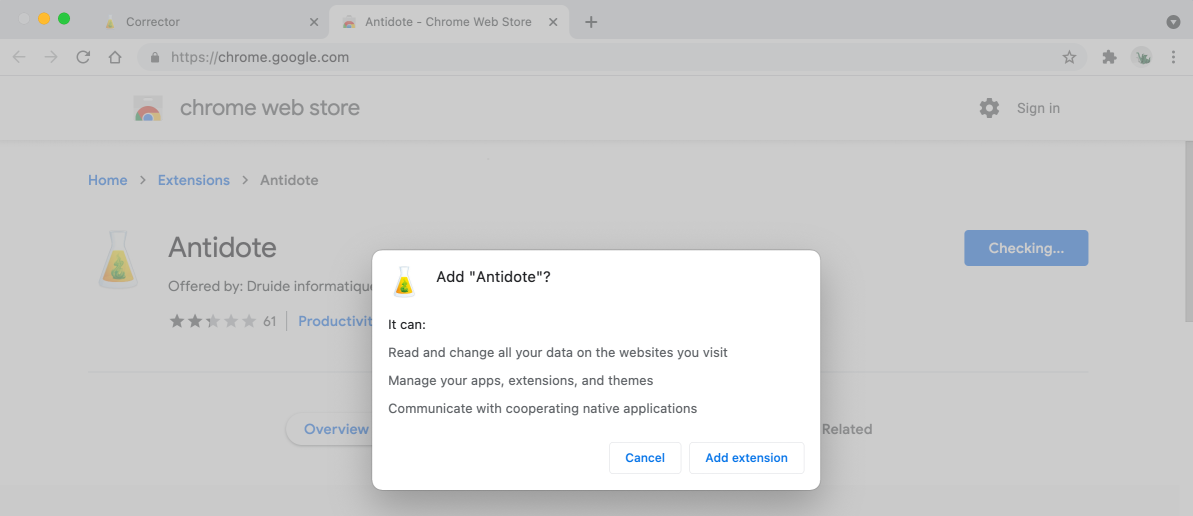
Click Add extension.
-
 4
4
-
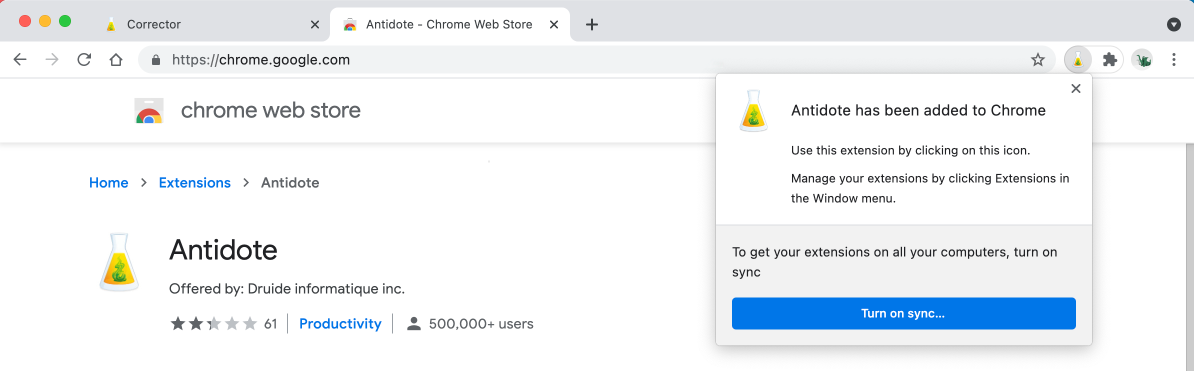
That’s it! A confirmation window tells you that the connector has been added.
-
 AB
AB
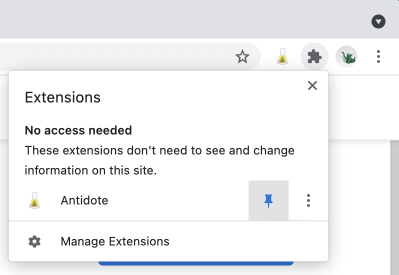
Tip — To make sure Antidote’s flask icon always appears in the toolbar, pin it by clicking the Chrome extensions icon (A) then the pin symbol (B).